Starting Your Workspace
This page will help you to start a workspace to run your code and experiments on the DSRI in a container.
Introduction to containers
Anything running in DSRI needs to be running in a docker container. Docker containers are namespaces that share the kernel on a linux system, you can see them as a clean minimalist Linux computers with only what you need to run your programs installed. This allows you to completely control the environment where your code runs, and avoid conflicts.
When running experiments we can start from existing images that have been already published for popular data science applications with a web interface. You can use, for example, JupyterLab when running python, RStudio when running R, or VisualStudio Code if you prefer.
Once you access a running container, you can install anything you need like if it was a linux/ubuntu computer (most of them runs with admin privileges), and run anything via the notebook/RStudio/VSCode interface, or the terminal.
Choose your interface
First step to get your code running on the DSRI is to pick the base interface you want to use to access your workspace on the DSRI.
We prepared generic Docker images for data science workspaces with your favorite web UI pre-installed to easily deploy your workspace. So you just need to choose your favorite workspace, start the container, access it, add your code, and install your dependencies.
- Login to the DSRI dashboard
- Select your project, or create one with a meaningful short name representing your project, e.g.
workspace-yourname - Go to the +Add page, and select to add From Developer Catalog => All services
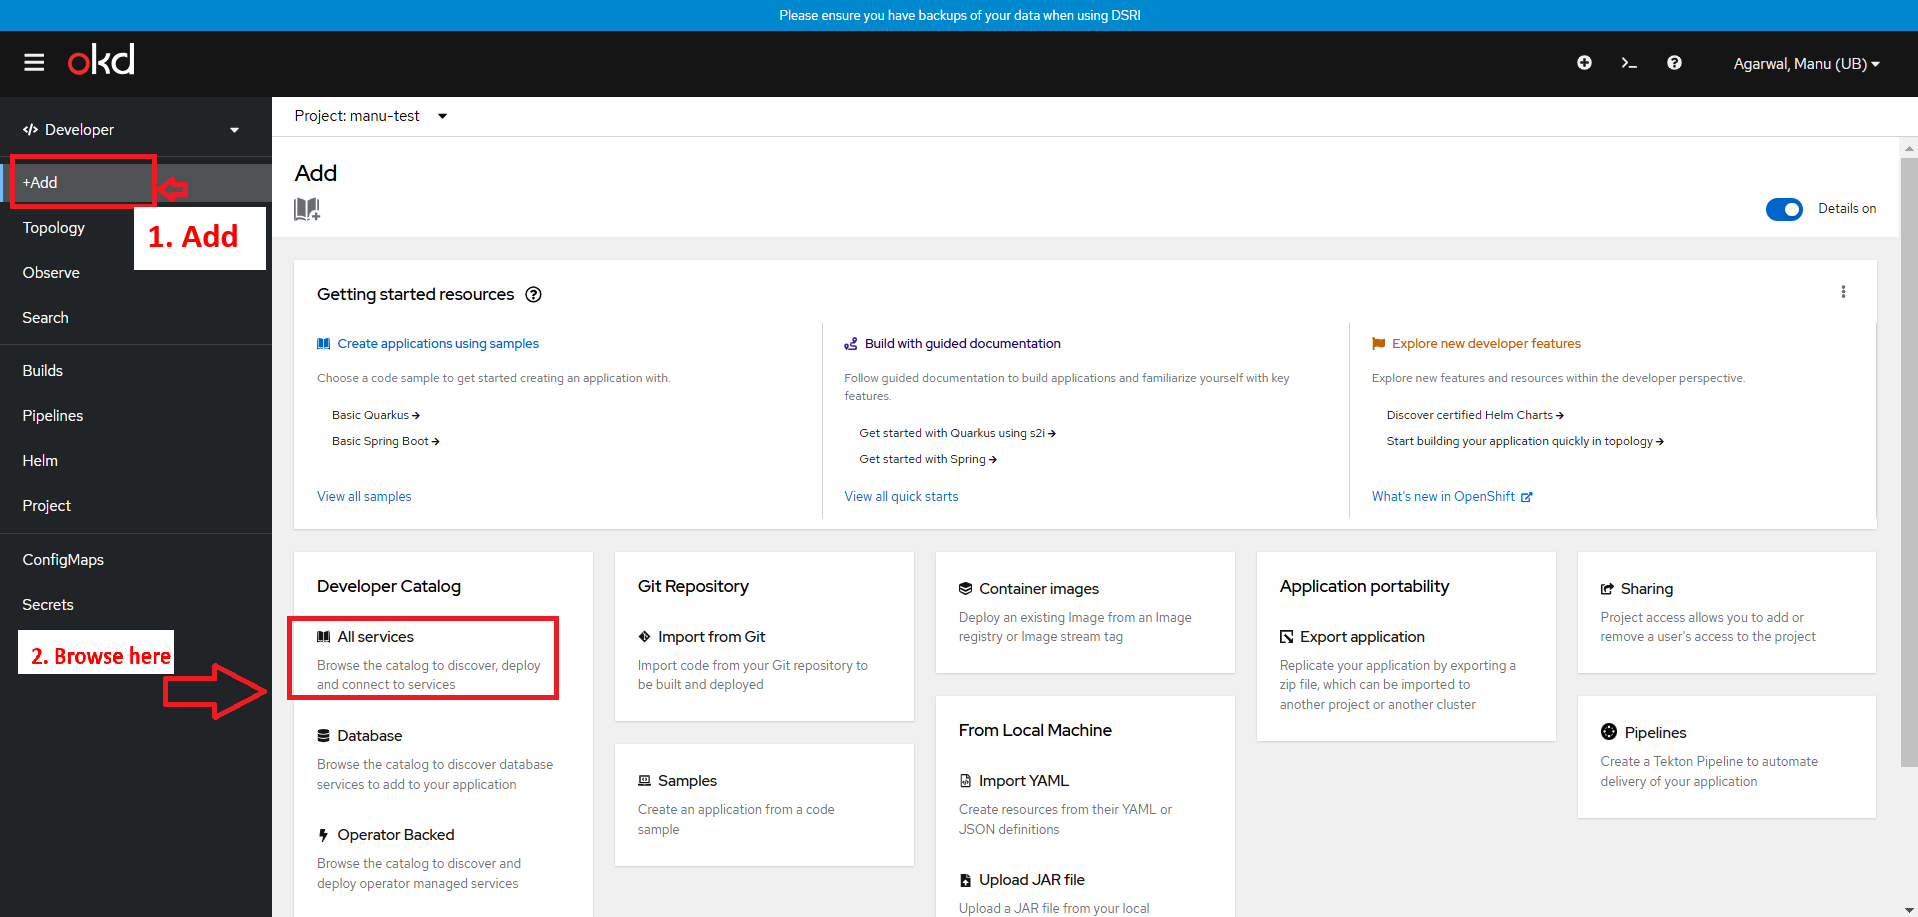
- Search for templates corresponding to the application you want to deploy among the one described below (make sure the filter for templates is properly checked).
JupyterLab: Access and run your code using the popular Jupyter notebooks, with kernel for python, java, R, julia. It also provides a good web interface to access the terminal, upload and browse the files.
VisualStudio Code: Your daily IDE, but in your browser, running on the DSRI.
RStudio: R users favorite's.
The terminal: For people who are used to the terminal and just want to run scripts, it provides smaller and more stable images, which makes installation and deployment easier. You can use the Ubuntu template to start a basic ubuntu image and access it from the terminal.
Any web interface: You can easily run and access most programs with a web interface on the DSRI. You can use the template Custom workspace if your application is exposed on port 8888. Otherwise visit the page Anatomy of a DSRI application for more details.
Desktop interface: there is the possibility to start a container as a Linux operating system with a graphical desktop interface. It can be useful to deploy software like Matlab, but the setup can be a bit more complex. You will get an Ubuntu computer with a basic Desktop interface, running on the DSRI, that you can access directly in your web browser. The desktop interface is accessed through a web application by using noVNC, which exposes the VNC connection without needing a VNC client.
You can also find more documentation on the different applications that can be deployed from the DSRI under Deploy applications in the menu on the left.
Start your workspace
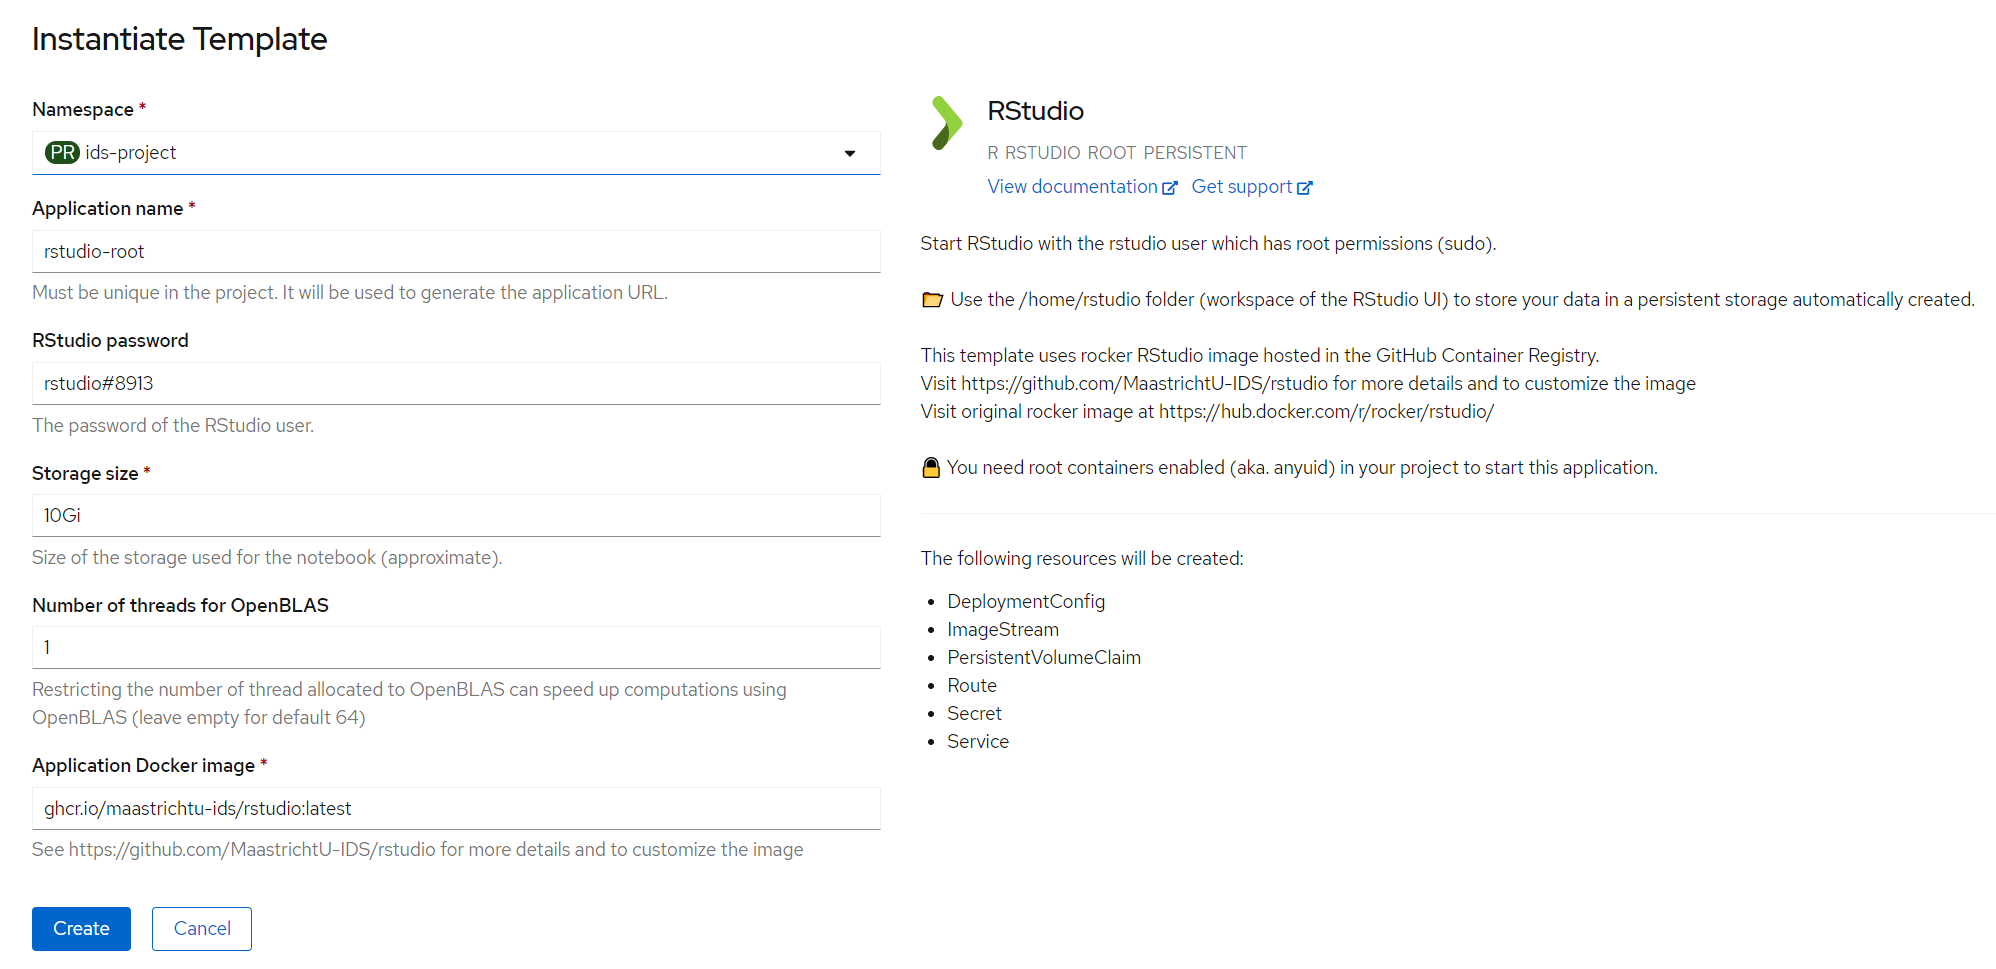
Once you chose your favorite way to run your experiments, you can click on the application you want to use for your workspace. Checkout the description to learn more details about the application that will be deployed.
Then click on Instantiate Template, and fill the parameters, such as the password to access the web UI. Note that the application name needs to be unique in the project. Finally click on the Create button.
You should see your application in your project dashboard, it can take a few seconds to a few minutes to pull the docker image and start the application.
Once the application has started you will be able to access it by clicking on its circle, then click the Route, that has been automatically generated for the web interface, in the Resources tab.
For a more detailed tutorial, you can follow the workshop to start Data Science applications on the DSRI
Upload your code and data
We recommend you to use git to clone your project code in your workspace, as it helps sharing and managing the evolution of your project.
It will be preinstalled in most images, otherwise you can install it easily with apt-get install git
With web interface like JupyterLab, VisualStudio Code and Rstudio you can easily upload small and medium size files directly through the UI with a drag and drop.
Otherwise you can use the terminal, install the oc client, and use the oc cp or oc rsync commands to upload large files to your workspace on the DSRI. See the Upload data page for more details.
Install your dependencies
Once the workspace is started, you can install the different dependencies you need to run your experiments.
It is recommended to save all the commands you used to install the different requirements in a script (e.g. install.sh). This will insure you can reinstall the environment easily and faithfully if the container is restarted. You can also use them to create a Docker image with everything prepared for your application.
Most containers for science are based on debian/ubuntu, so you can install new packages with apt-get:
apt-get update
apt-get install -y build-essentials wget curl
Run your code
You can use your web interface to run your code as you like to do: notebooks, rstudio, execute via VSCode
Note that for jobs which are running for a long time the web UI is not always the best solution, e.g. Jupyter notebooks can be quite instable when running a 30 min codeblock.
A quick solution for that is to run your code in scripts, using the bash terminal. You can use the nohup prefix, and & suffix to run your script in the background, so that you can even disconnect, and come back later to check the results and logs.
For example with a python script, you would do:
nohup python my_script.py &
The script will run in the background, and all terminal output will be stored in the file nohup.out
You can also check if the process is currently running by typing ps aux or top
You can kill the process by getting the process ID (PID) using the previous commands, and then: kill -9 PID