Dask Cluster
🧊 Installation with Helm
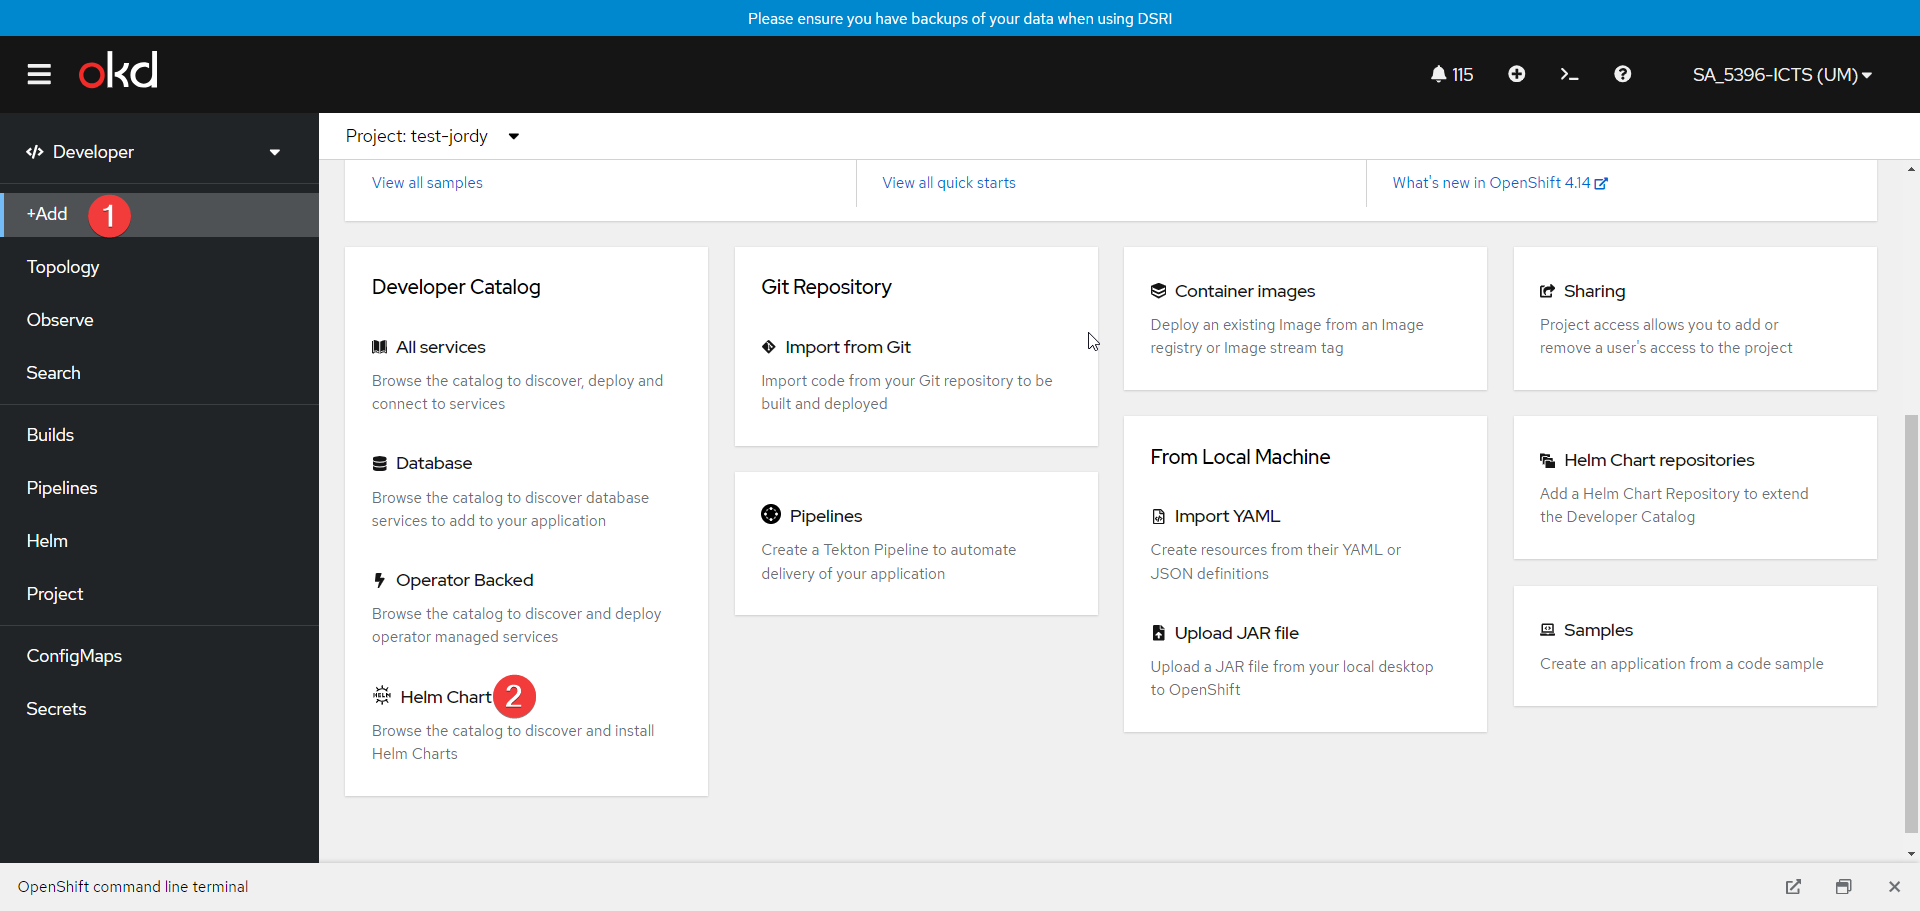
- Go to the +Add page, and select to add Helm Chart
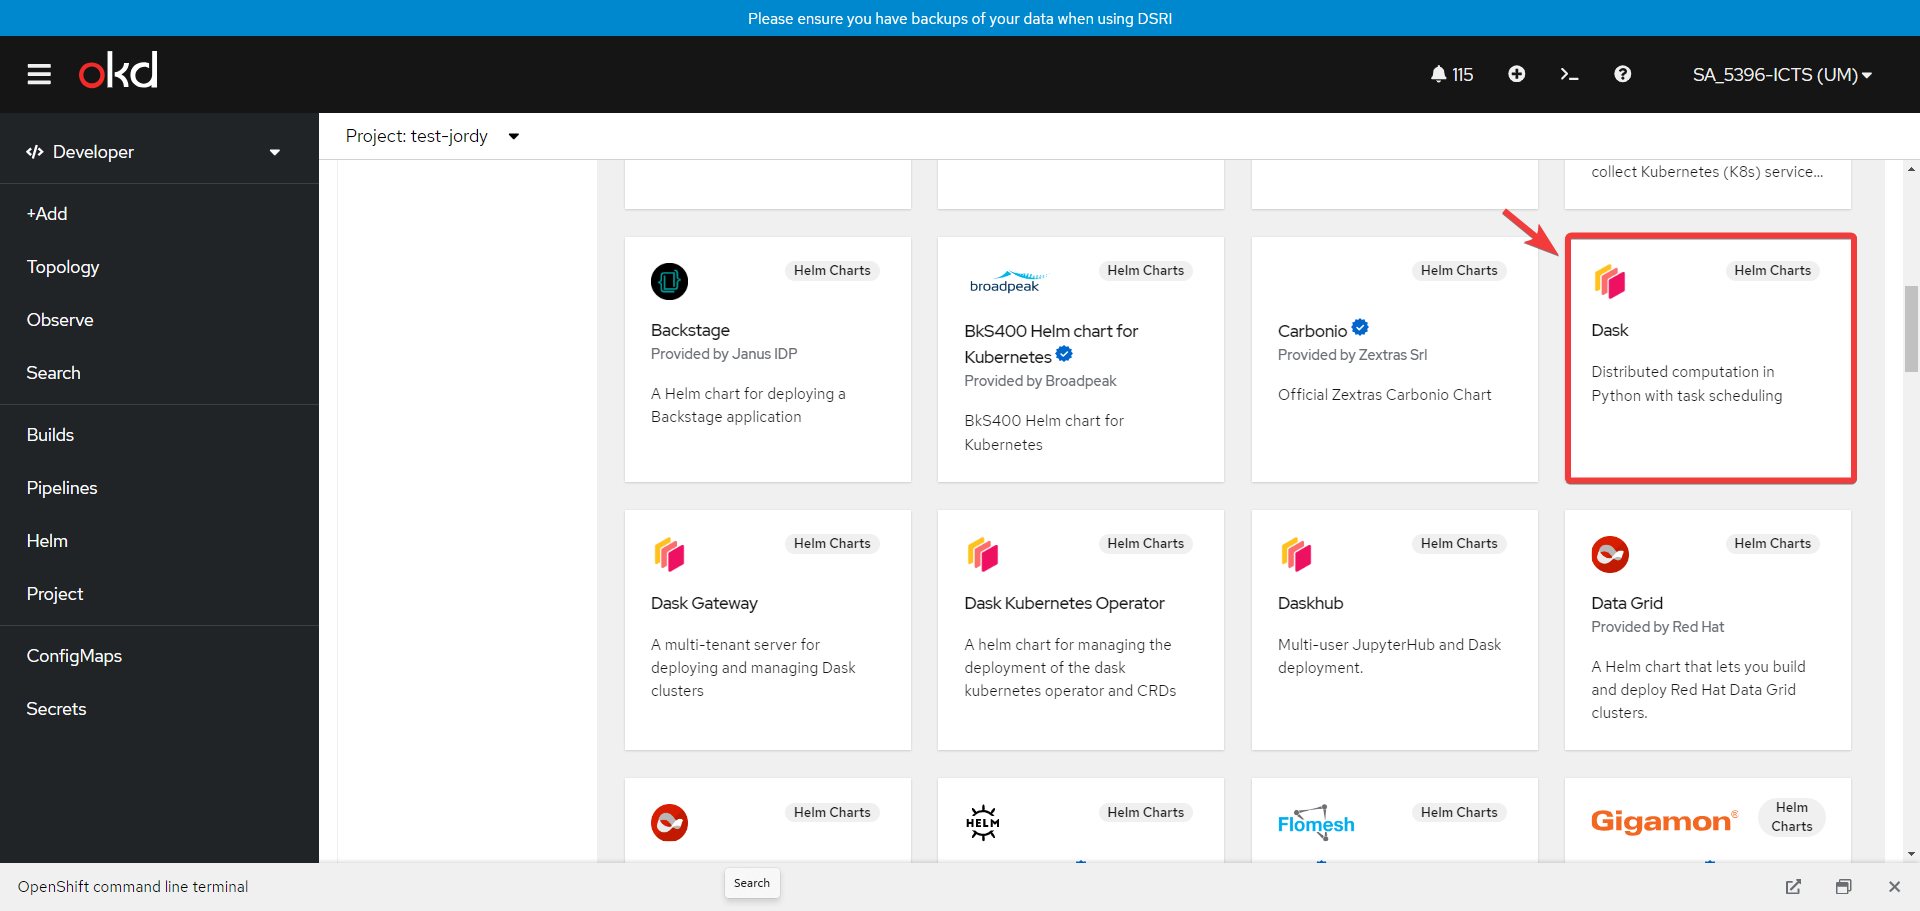
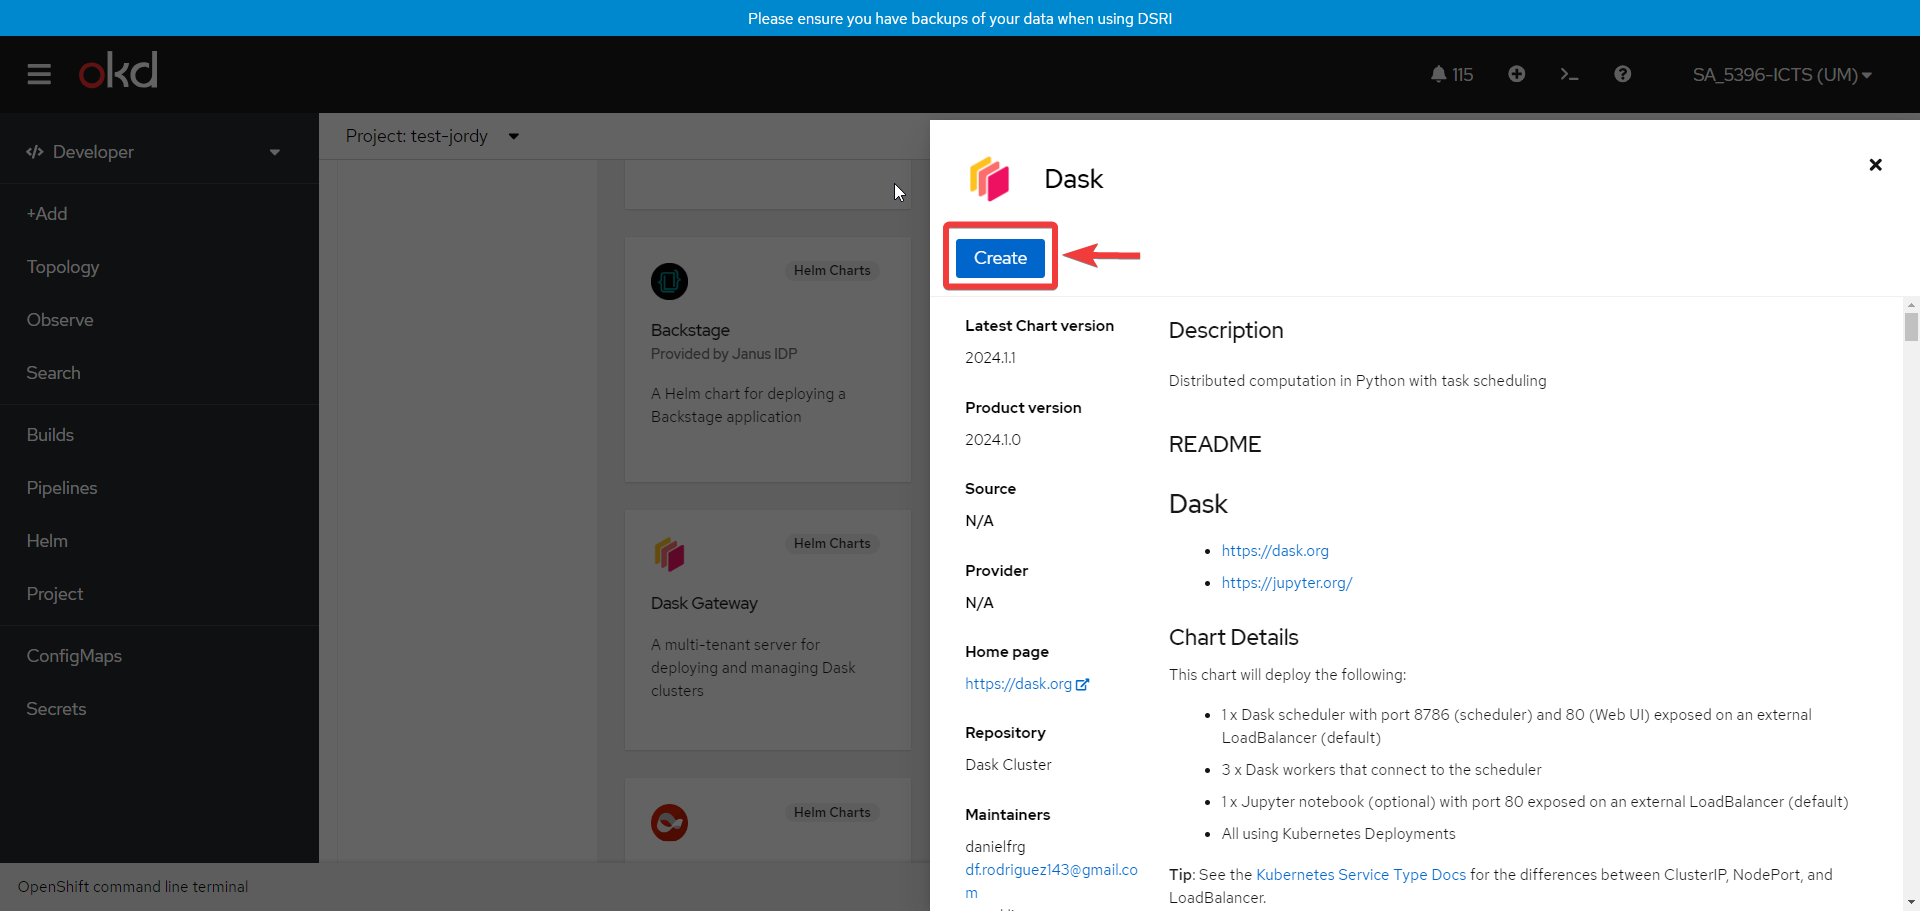
- Search and Select the Dask chart then click on Create
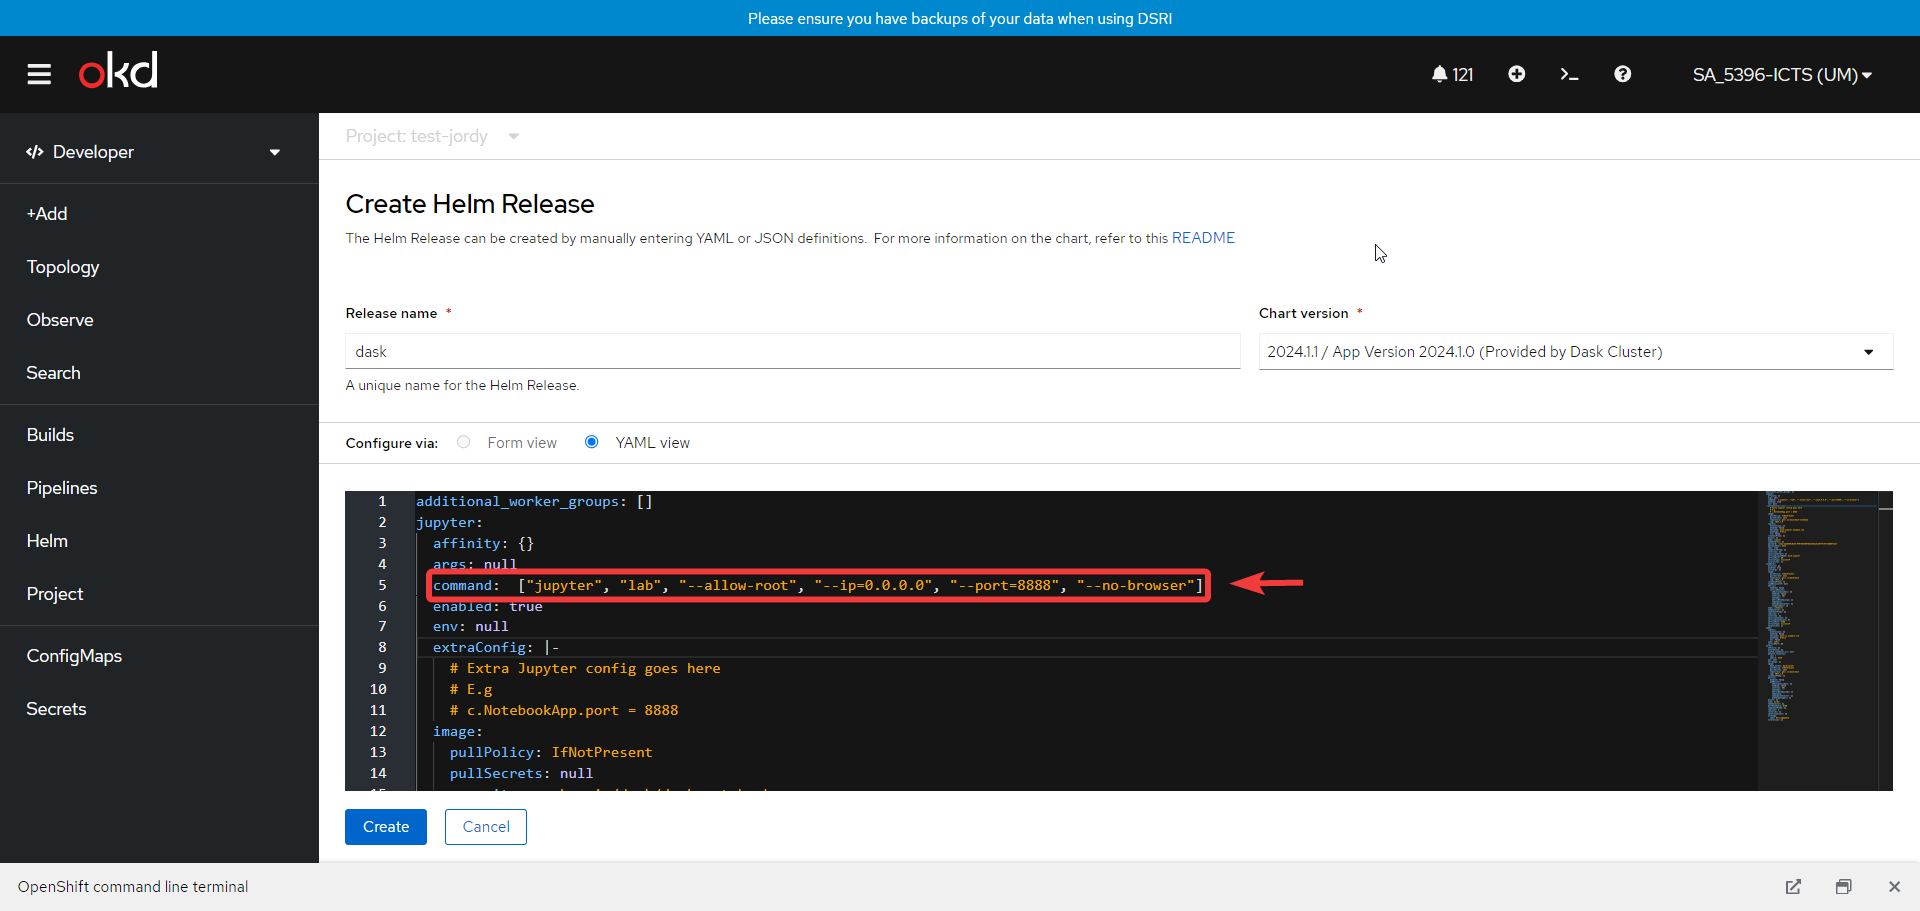
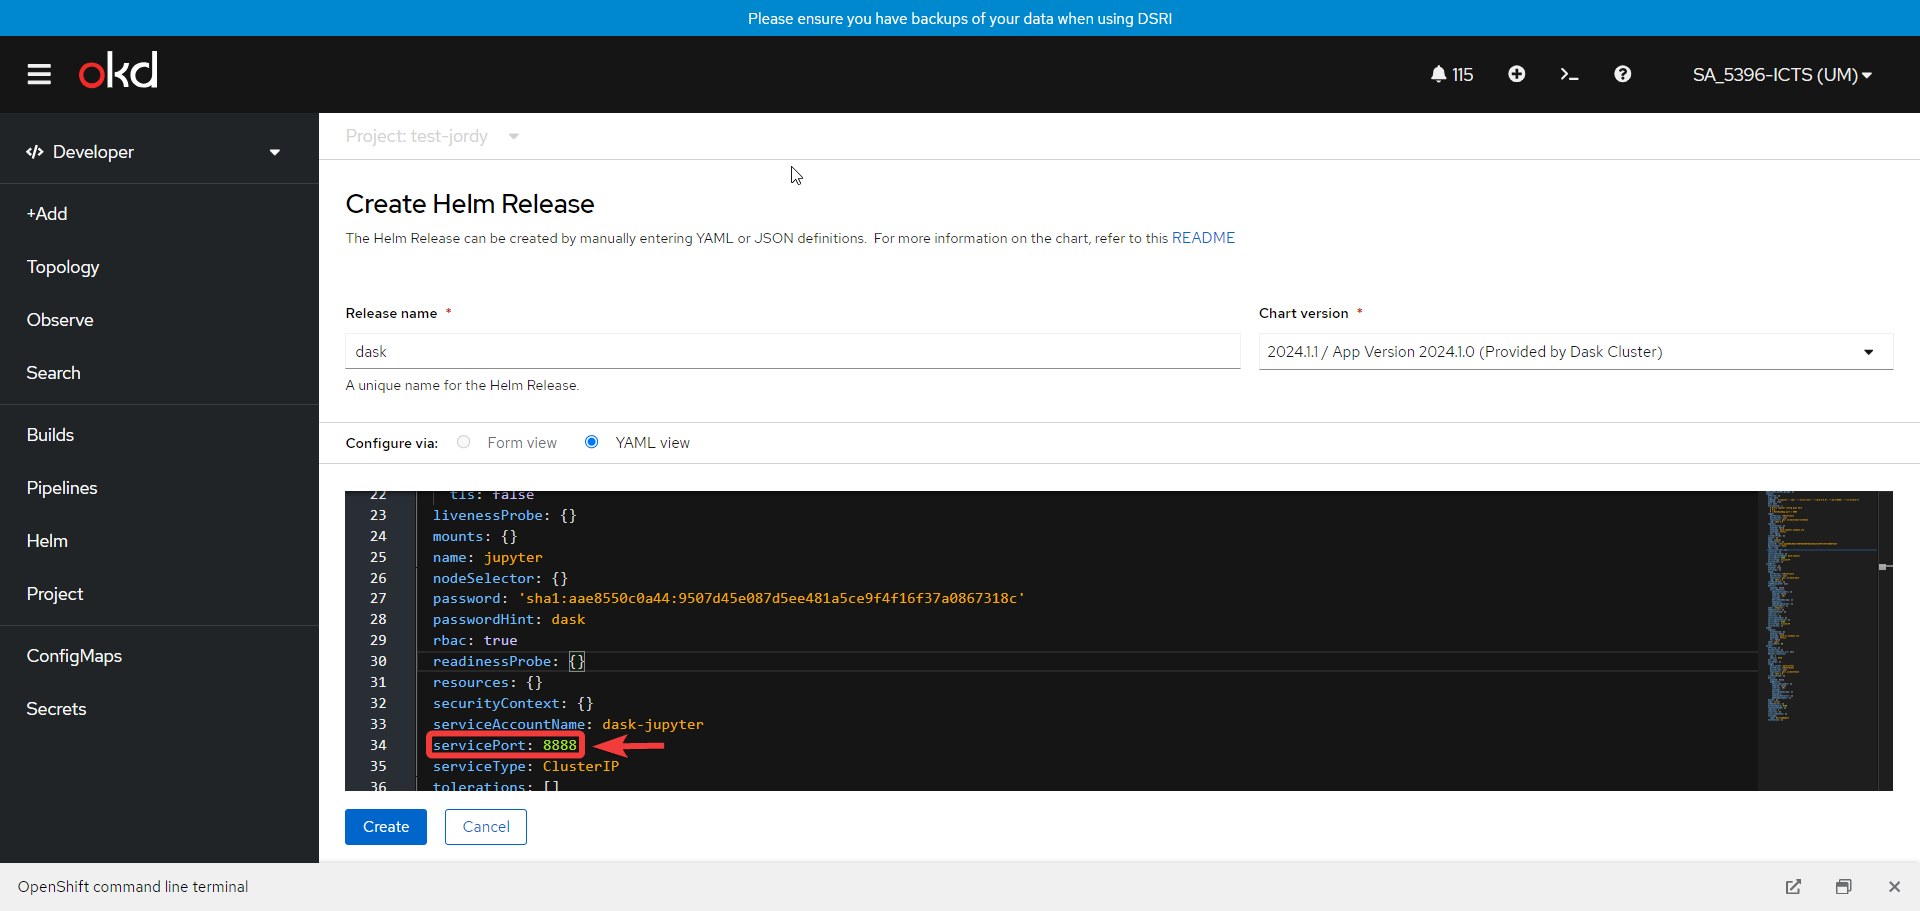
- Configure the Yaml file, while under the
Jupytersection:Command: ["jupyter", "lab", "--allow-root", "--ip=0.0.0.0", "--port=8888", "--no-browser"]servicePort: 8888
- Add Storage to the dask-jupyter pod as shown below
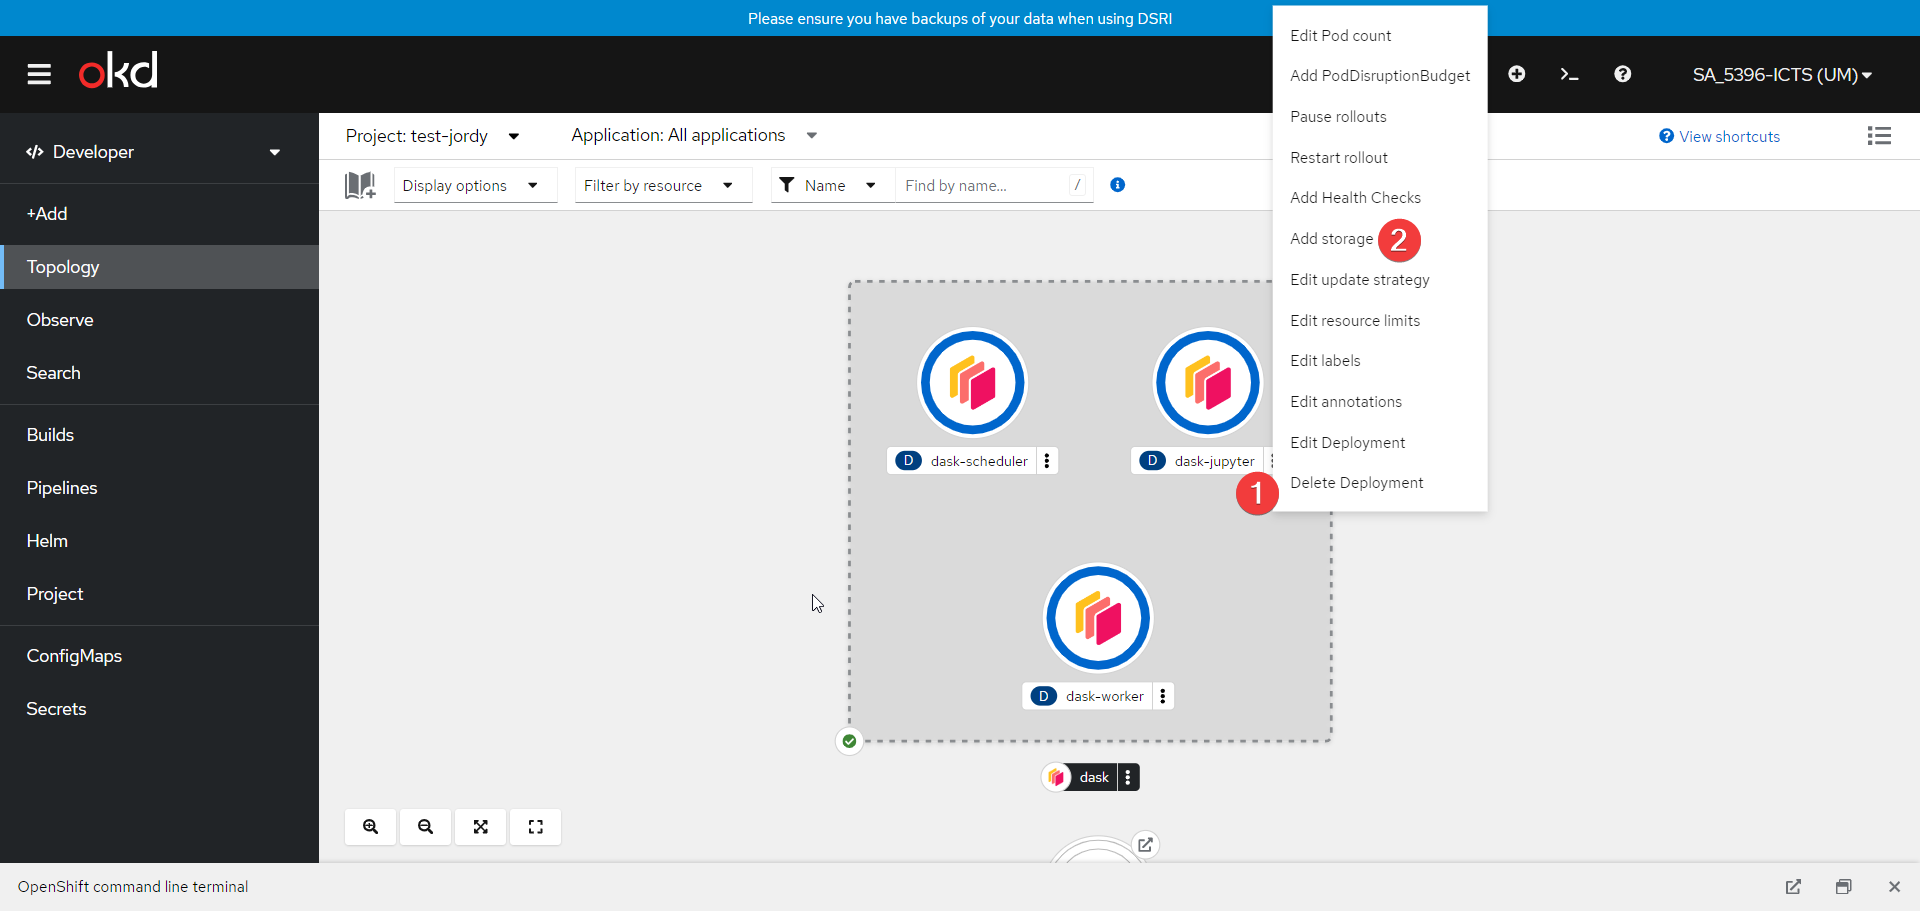
- Set up a new Persistent Volume Claim for the cluster as shown below

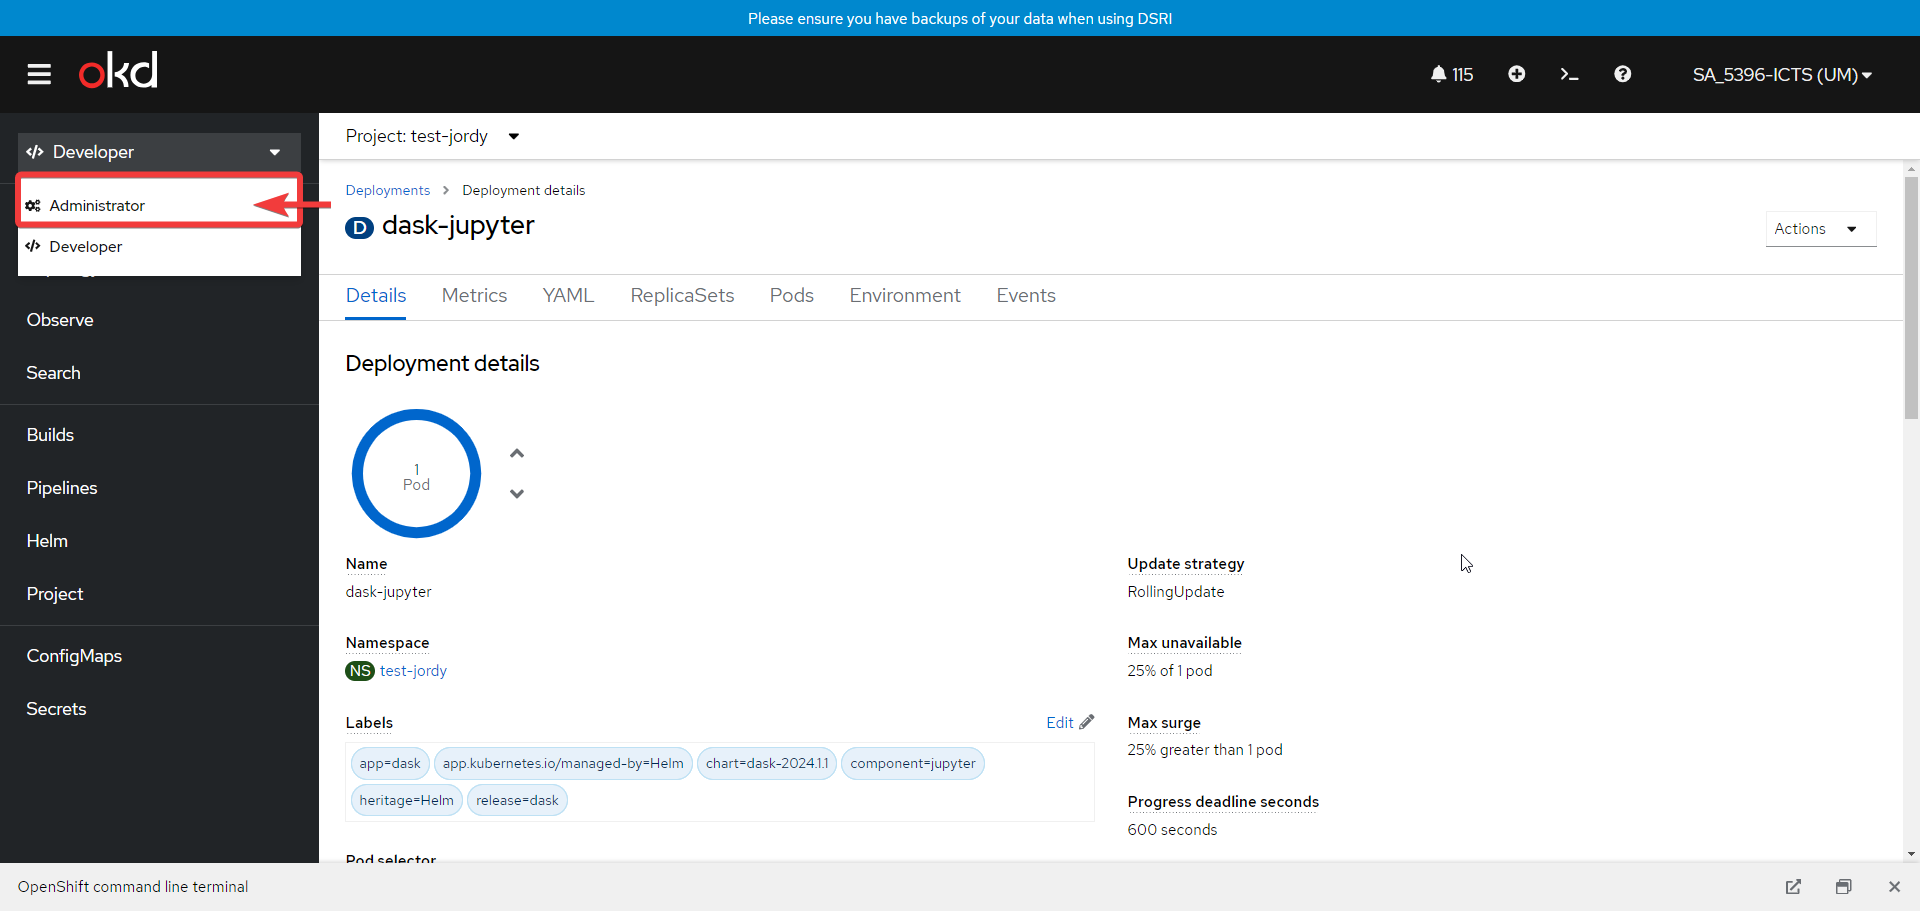
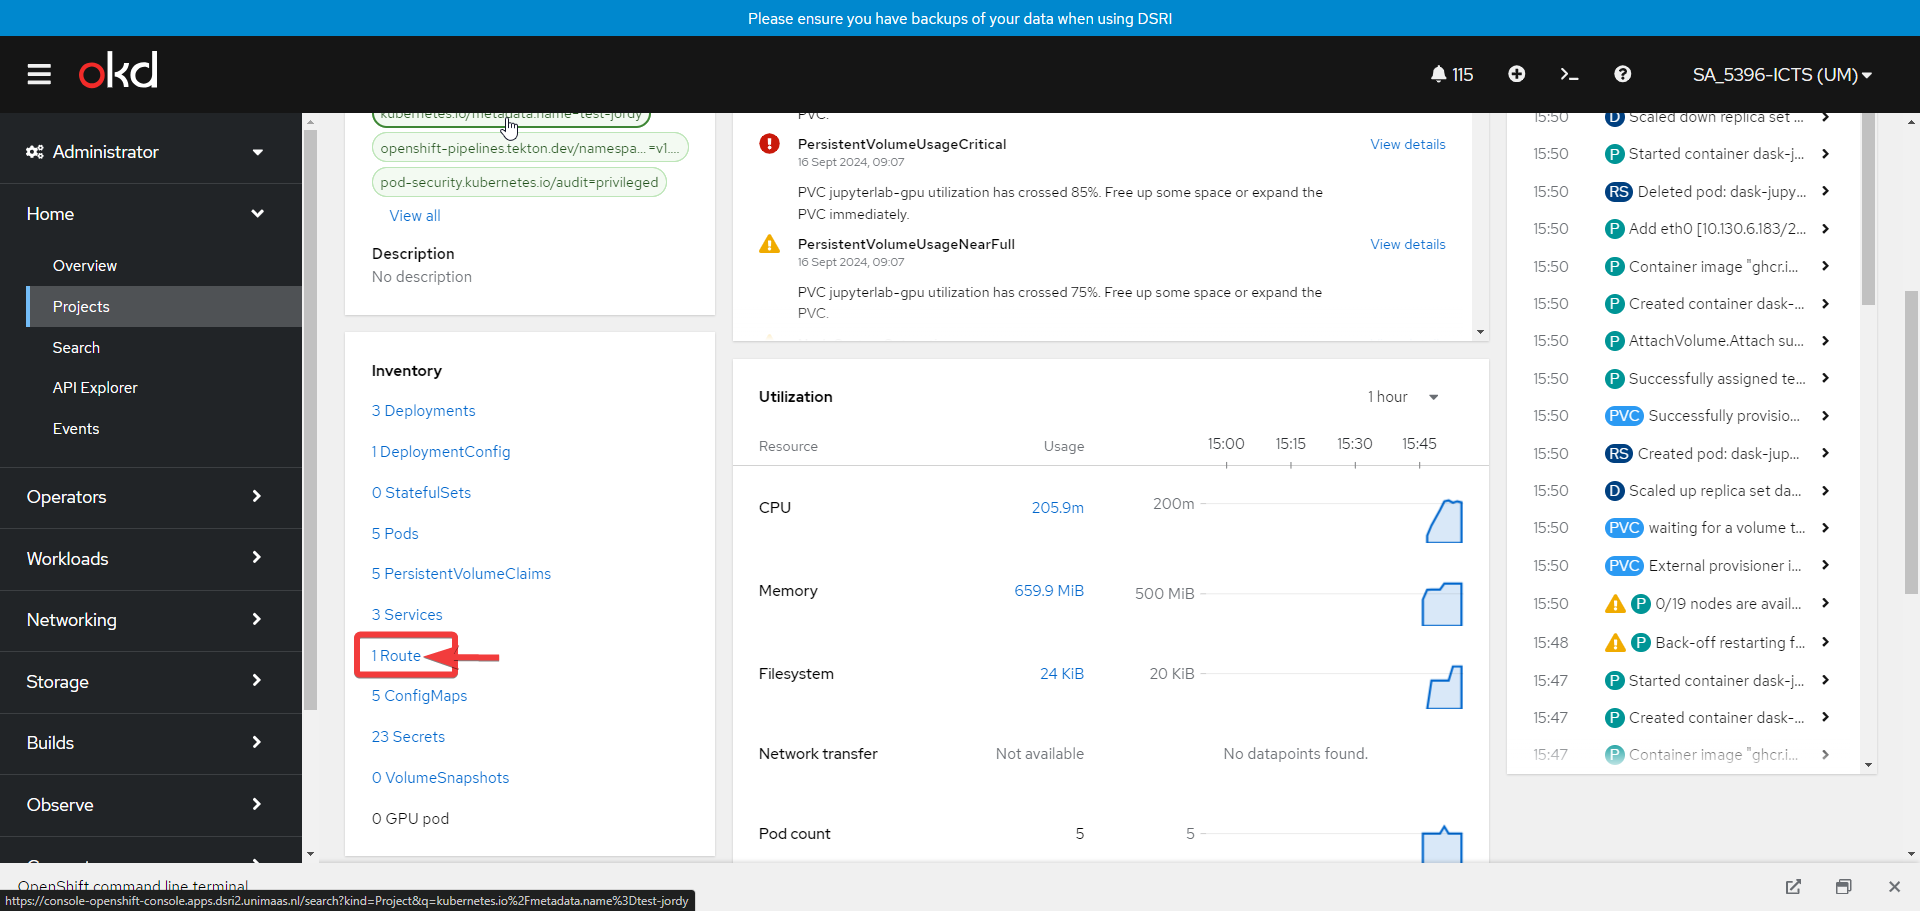
🪐 Configure a Route for the Cluster
- Switch to the Administrator view and navigate to Route
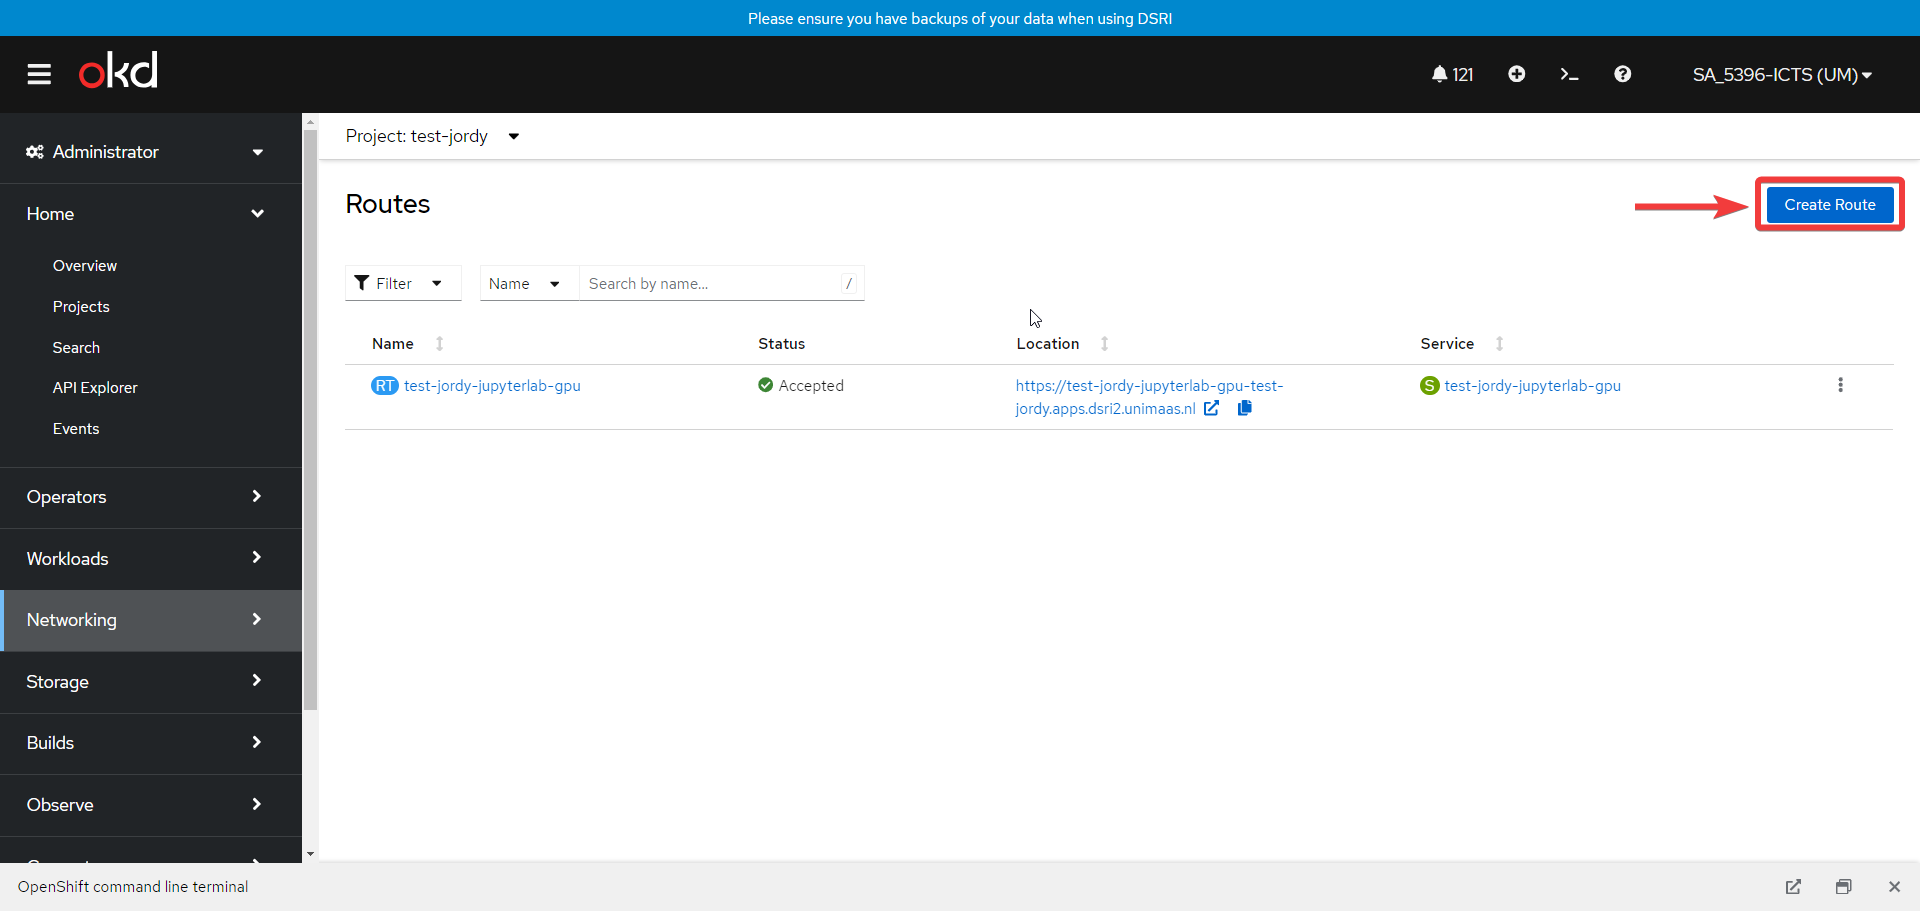
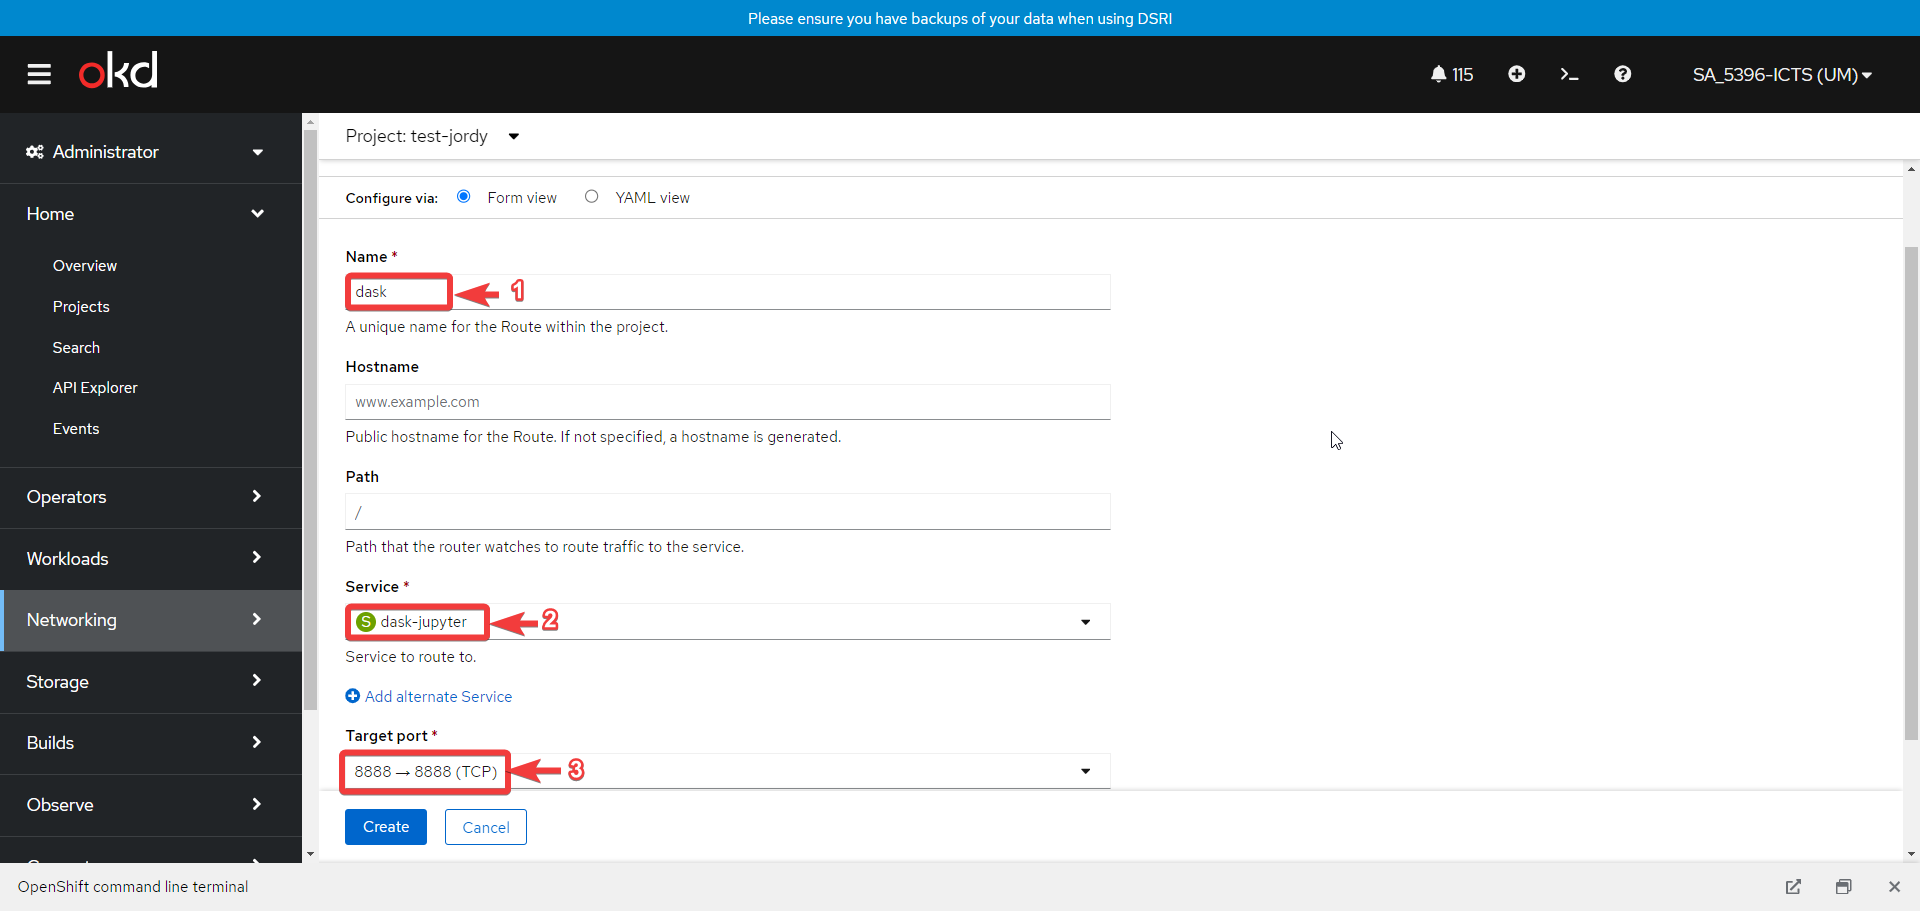
- Create a new route by clicking the button Create Route with the setup as shown below
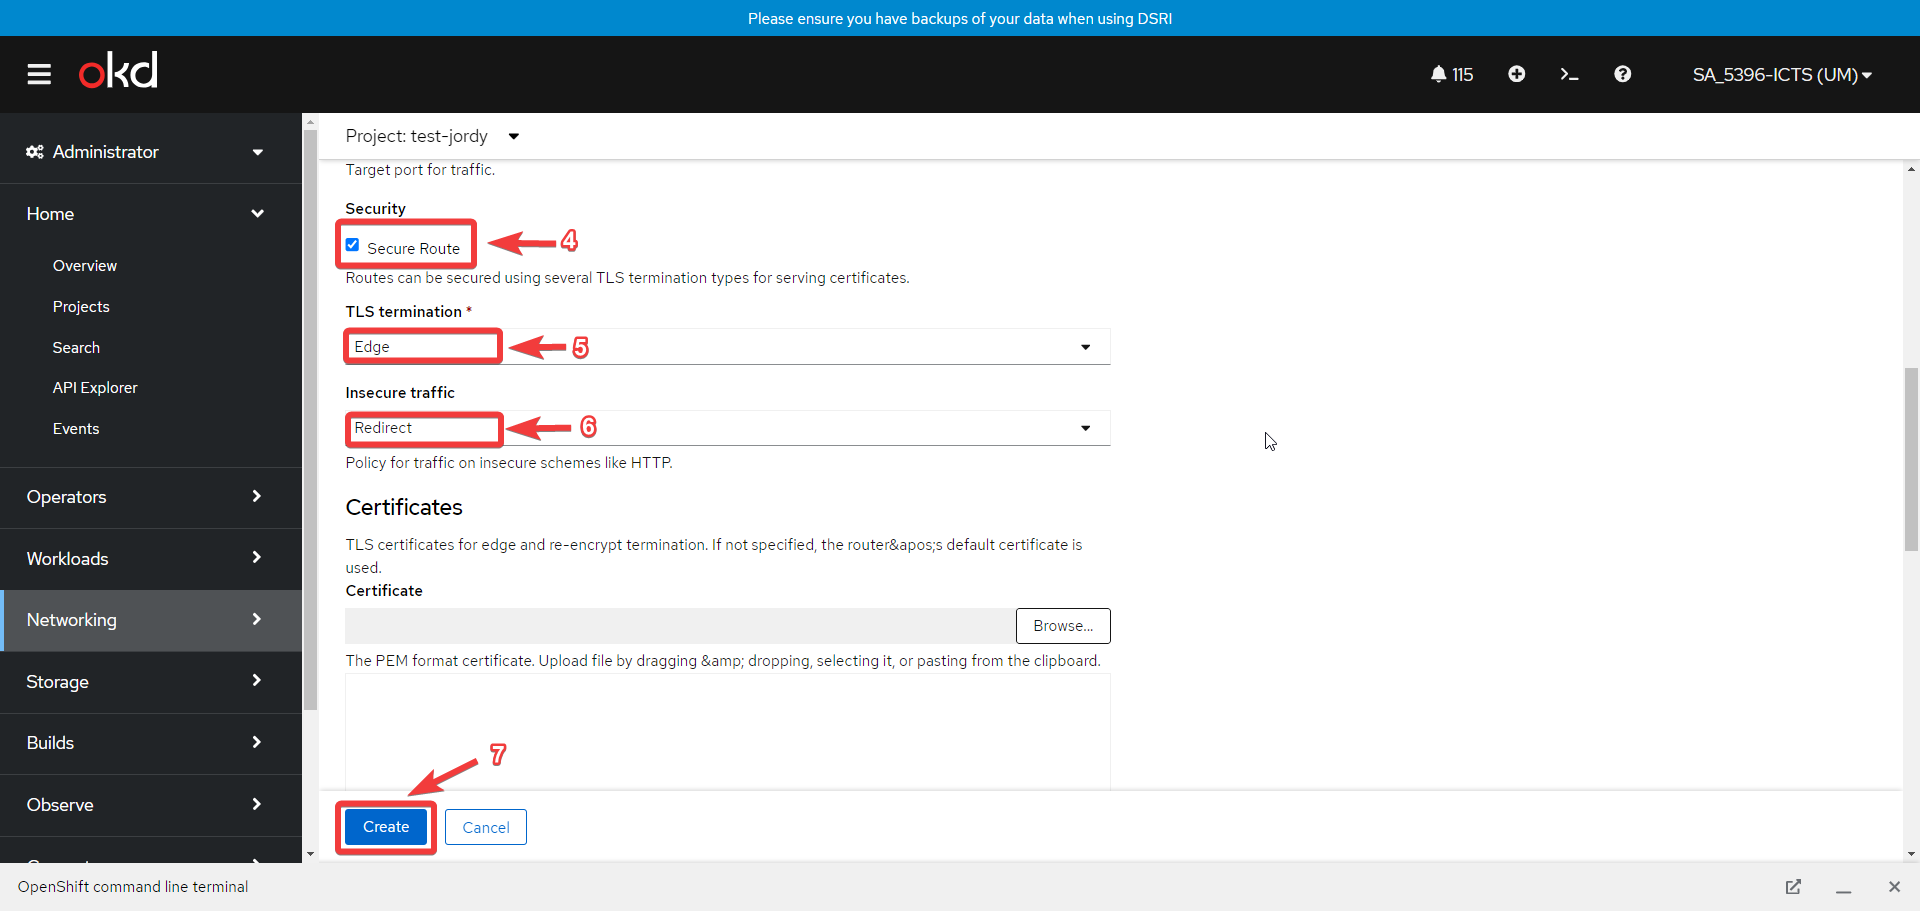
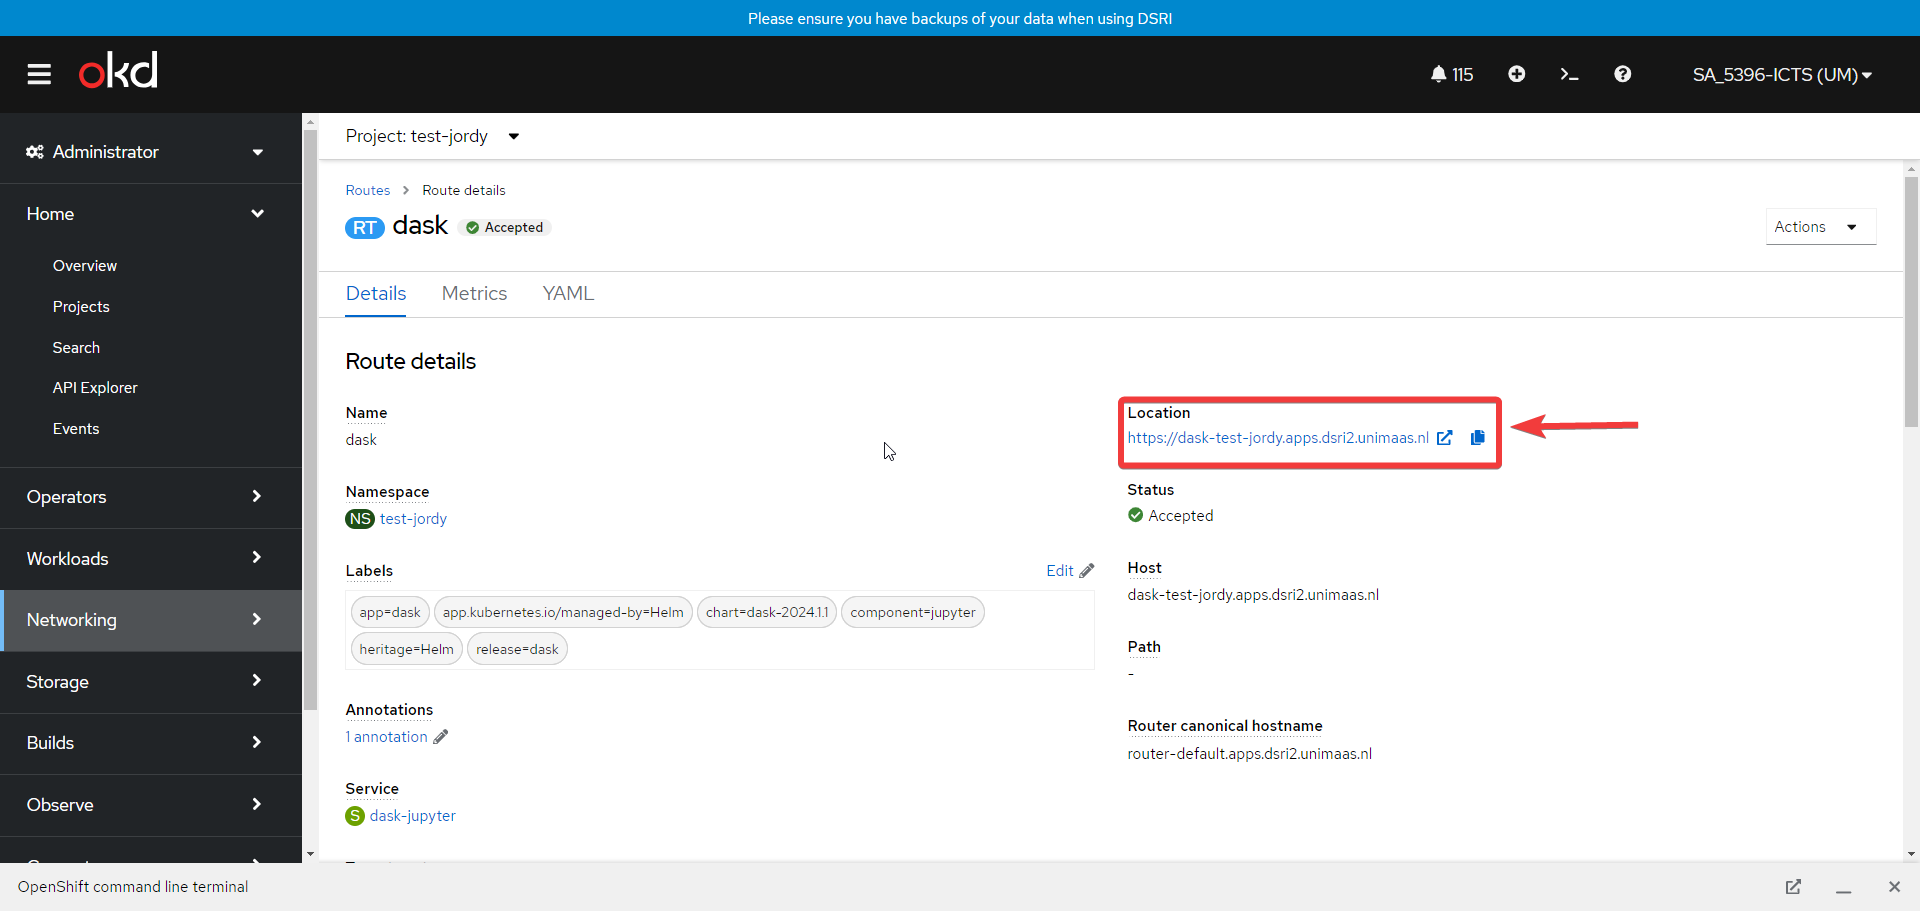
- Navigate the provided link to access your local cluster
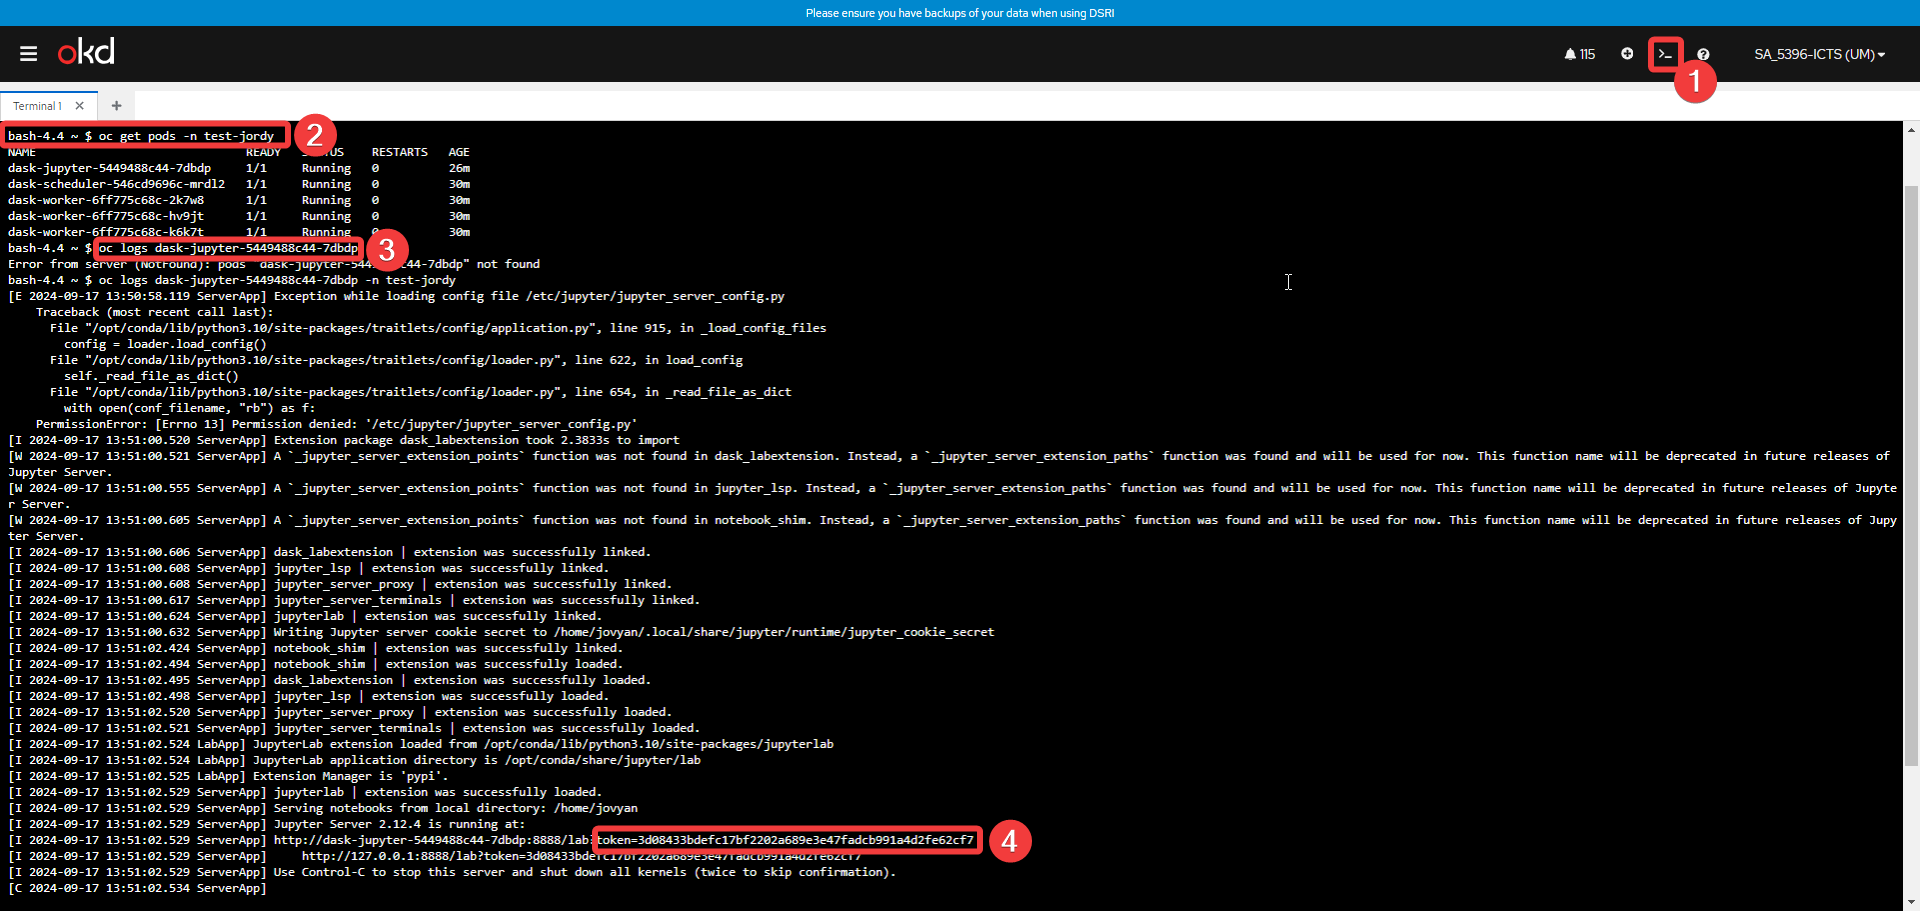
🪐 Access the Jupyter Password/Token
- Start up the terminal
- Run
oc get podsto find the full podname of the dask-jupyter - Run
oc logs <podname>and copy the token used to access the jupyter notebook
- Run