Spark cluster
To be able to deploy Spark you will need to ask the DSRI admins to enable the Spark Operator in your project. It will be done quickly, once enabled you will be able to start a Spark cluster in a few clicks.
Deploy a Spark cluster
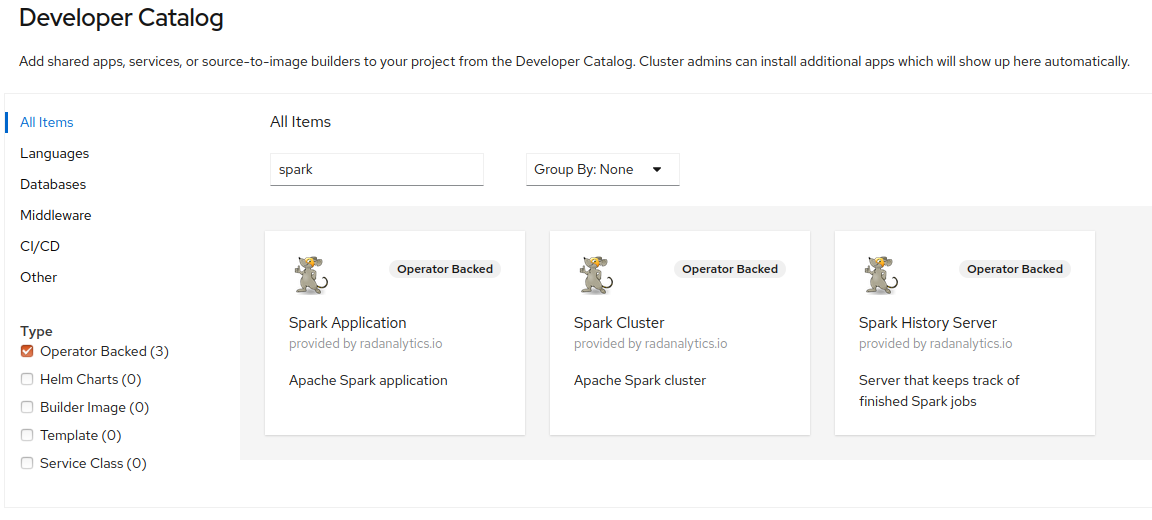
Once the DSRI admins have enabled the Spark Operator your project, you should found a Spark Cluster entry in the Catalog (in the Operator Backed category)
Deploy the cluster from the catalog

Click on the Spark Cluster entry to deploy a Spark cluster.
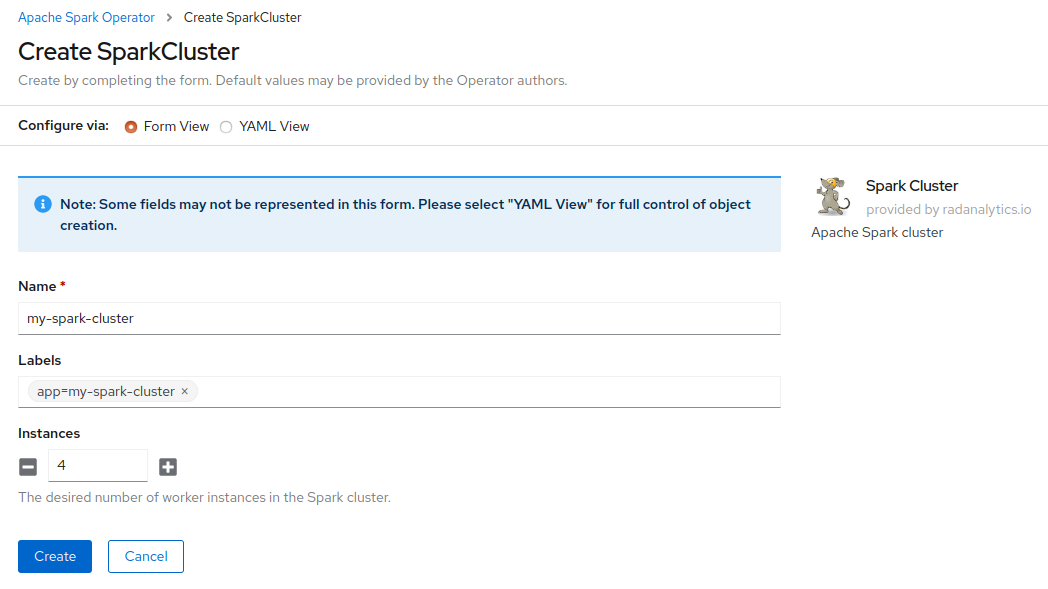
You will be presented a form where you can provide the number of Spark workers in your cluster.
Additionally you can provide a label which can be helpful later to manage or delete the cluster, use the name of your application and the label app, e.g.: app=my-spark-cluster

The number of Spark workers can be easily updated later in the Spark deployment YAML file.
Create a route to the Spark dashboard
Once the cluster has been started you can create a route to access the Spark web UI:
Go to Search > Click on Resources and search for Route > Click on Route
You should now see the routes deployed in your project. Click on the button Create Route
- Give a short meaningful name to your route, e.g.
my-spark-ui - Keep Hostname and Path as it is
- Select the Service corresponding your Spark cluster suffixed with
-ui, e.g.my-spark-cluster-ui - Select the Target Port of the route, it should be 8080
You can now access the Spark web UI at the generated URL to see which jobs are running and the nodes in your cluster.
Run on Spark
You can now start a spark-enabled JupyterLab, or any other spark-enabled applications, to use the Spark cluster deployed.
Using PySpark
The easiest is to use a Spark-enabled JupyterLab image, such as jupyter/pyspark-notebook
But you can also use any image as long as you download the jar file, install all requirements, such as pyspark, and set the right environment variable, such as SPARK_HOME
Connect to a Spark cluster deployed in the same project, replace spark-cluster by your Spark cluster name:
from pyspark import SparkConf, SparkContext
from pyspark.sql import SparkSession
# Stop existing Spark Context
spark = SparkSession.builder.master("spark://spark-cluster:7077").getOrCreate()
spark.sparkContext.stop()
# Connect to the Spark cluster
conf = SparkConf().setAppName('sansa').setMaster('spark://spark-cluster:7077')
sc = SparkContext(conf=conf)

# Run basic Spark test
x = ['spark', 'rdd', 'example', 'sample', 'example']
y = sc.parallelize(x)
y.collect()
RDF analytics with SANSA and Zeppelin notebooks
SANSA is a big data engine for scalable processing of large-scale RDF data. SANSA uses Spark, or Flink, which offer fault-tolerant, highly available and scalable approaches to efficiently process massive sized datasets. SANSA provides the facilities for Semantic data representation, Querying, Inference, and Analytics.
Use the Zeppelin notebook for Spark template in the catalog to start a Spark-enabled Zeppelin notebook. You can find more information on the Zeppelin image at https://github.com/rimolive/zeppelin-openshift
Connect and test Spark in a Zeppelin notebook, replace spark-cluster by your Spark cluster name:
%pyspark
from pyspark import SparkConf, SparkContext
from pyspark.sql import SparkSession
# Stop existing Spark Context
spark = SparkSession.builder.master("spark://spark-cluster:7077").getOrCreate()
spark.sparkContext.stop()
# Connect to the Spark cluster
conf = SparkConf().setAppName('sansa').setMaster('spark://spark-cluster:7077')
sc = SparkContext(conf=conf)

# Run basic Spark test
x = [1, 2, 3, 4, 5]
y = sc.parallelize(x)
y.collect()
You should see the job running in the Spark web UI, kill the job with the kill button in the Spark dashboard.
You can now start to run your workload on the Spark cluster
Click on the cranked wheel in the top right of the note: Interpreter binding, and reset the interpreter
Use the official SANSA notebooks examples
See more examples:
Connect Spark to the persistent storage
Instructions available at https://github.com/rimolive/ceph-spark-integration
Requirements:
pip install boto
Check the example notebook for Ceph storage
Delete a running Spark cluster
Get all objects part of the Spark cluster, change app=spark-cluster to match your Spark cluster name:
oc get all,secret,configmaps --selector app=spark-cluster
Then delete the Operator deployment from the OpenShift web UI overview.